
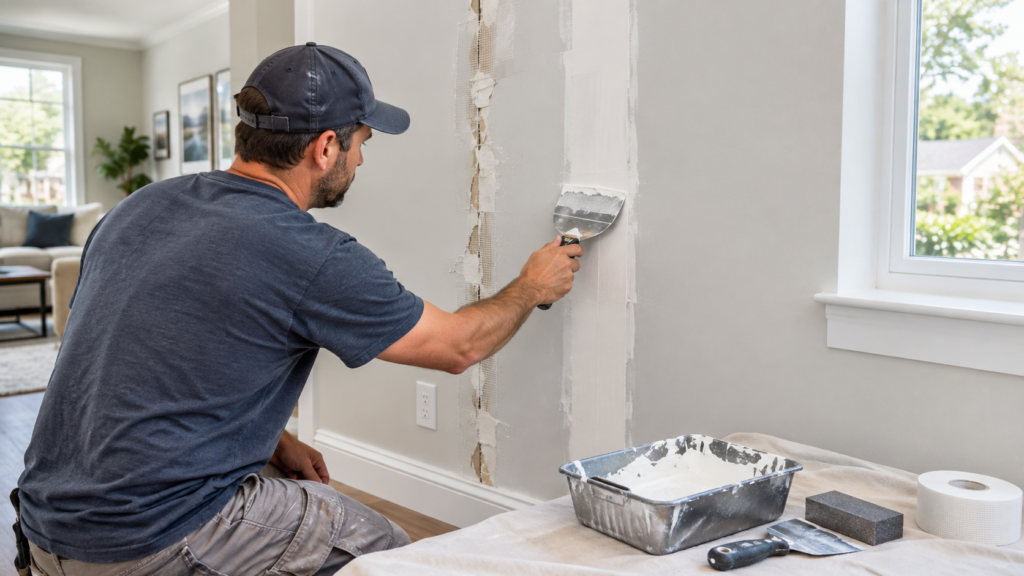
How to Repair Drywall Seams That Are Cracking or Separating
Cracks along drywall seams can make an otherwise clean wall or ceiling look worn and poorly finished. These cracks often appear where two drywall panels meet, especially around ceilings, corners, doors, and windows. Small cracks may seem harmless at first, but recurring or widening cracks can indicate movement, moisture problems, or an issue with the original installation.
Homeowners in Alpharetta, Georgia, may notice drywall seams cracking as their homes settle, indoor humidity changes, or building materials expand and contract. The right repair method depends on what caused the damage and whether the joint tape, joint compound, or drywall itself has failed.
Understanding how to repair drywall seams that are cracking or separating can help you choose the right fix and prevent the same problem from returning.
Why Do Drywall Seams Crack or Separate?
Drywall seams form where installers join two panels with joint tape and joint compound. When the joint loses its bond or the panels move, cracks can appear along the finished surface.
Common causes include:
-
House settling: Small structural movements can place stress on drywall joints.
-
Temperature and humidity changes: Drywall framing and finishing materials can expand or contract as indoor conditions change.
-
Poor installation: Installers may apply too little joint compound, use unsuitable tape, or fail to secure the panels properly.
-
Loose drywall panels: Missing or loose fasteners can allow panels to move and crack the seams.
-
Moisture exposure: Leaks or persistent dampness can weaken drywall and loosen joint tape.
-
Repeated movement: Doors closing, vibration, or movement around framing can contribute to cracks in vulnerable areas.
Before repairing a seam, identify the likely cause. If you only cover the crack without correcting the underlying problem, it may return.
Step-by-Step Guide to Repairing Cracked Drywall Seams
1. Inspect the Crack and Surrounding Area
Start by examining the entire damaged seam. Look for loose tape, peeling joint compound, bulging drywall, stains, soft spots, or cracks that extend beyond the joint.
A thin crack with firm surrounding drywall may need only a surface repair. A seam that has separated significantly or developed a raised ridge may require new tape and several coats of joint compound.
Check whether the crack appears on a wall, ceiling, inside corner, or near a door or window. Its location can help you identify possible movement or installation problems.
If you notice active water staining, a soft surface, or a crack that continues to widen, investigate the cause before applying any repair material.
If the seam crack appears on a ceiling, follow these additional tips for fixing drywall cracks in your ceiling.
2. Remove Loose Joint Compound and Tape
Use a utility knife or drywall knife to remove loose joint compound along the crack. If the joint tape has bubbled, lifted, or separated from the drywall, carefully remove the damaged section.
Do not pull off firmly attached tape unnecessarily. Removing too much material can enlarge the repair and create more finishing work.
Scrape away loose fragments until the remaining edges feel stable. Avoid cutting deeply into the drywall paper or damaging the surrounding surface.
3. Prepare the Damaged Seam
Brush away dust and loose particles so the repair materials can bond properly. If the drywall paper has torn, remove loose pieces without stripping away sound material.
If moisture caused the damage, fix the leak or ventilation problem first. Allow the area to dry completely before repairing it. Seal exposed or damaged drywall paper with an appropriate sealer when the repair system requires it.
For a small, stable crack with firmly attached tape, a suitable joint compound may be enough. For a seam with loose or missing tape, plan to retape the joint.
4. Apply Joint Compound
Use a drywall knife to spread a thin layer of joint compound over the prepared seam. Extend the compound slightly beyond the crack so you can blend the repair into the surrounding wall.
Avoid applying a thick layer in one pass. Thick compound takes longer to dry and may shrink or crack as it cures.
For a minor surface crack, a compatible joint compound may fill the gap. However, if the original tape has separated, compound alone will not provide the reinforcement the seam needs.
Follow the product instructions for application and drying times.
5. Install New Joint Tape When Needed
If the original tape has lifted or failed, remove the damaged section and apply new drywall joint tape. Paper tape and fiberglass mesh tape have different application requirements, so choose a product suitable for the repair and follow its manufacturer’s instructions.
For paper tape, apply a bedding layer of joint compound, position the tape over the seam, and press it into the compound with a drywall knife. Smooth out air bubbles and remove excess material.
If you use self-adhesive mesh tape, follow the product instructions for applying joint compound over it. Some mesh-tape systems require a specific compound to achieve a durable joint.
Keep the tape flat and centered over the seam. Wrinkles, trapped air, and uneven coverage can leave visible imperfections after painting.
6. Apply Additional Coats and Feather the Edges
Allow the first coat to dry as directed. Apply a second, wider coat of joint compound over the taped area, then feather the edges into the surrounding drywall.
A final thin coat can help create a smooth transition between the repaired seam and the existing wall.
Use progressively wider strokes instead of building up a narrow ridge directly over the crack. This technique helps conceal the repair once you paint the surface.
Do not rush the process. Applying another coat before the previous layer has dried can lead to uneven results.
7. Sand and Inspect the Repair
Once the compound has dried completely, lightly sand the repaired area with fine-grit sandpaper or a drywall sanding sponge. Use gentle pressure to smooth ridges without exposing the tape.
Wipe away the dust and inspect the seam under good lighting. Look across the surface from different angles because small ridges and depressions may become more visible after painting.
If you find low spots or rough edges, apply another thin coat, let it dry, and sand again.
8. Prime and Paint the Surface
Apply a suitable drywall primer to the repaired area. Primer helps the paint adhere evenly and reduces differences in absorption between the compound and the surrounding wall.
After the primer dries, repaint the surface with a matching finish. You may need to paint a larger section or the entire wall to achieve a consistent appearance.
If the repaired seam sits on a textured wall or ceiling, match the existing texture before priming and painting.
Can You Repair Drywall Seams Without Replacing the Drywall?
Yes. Many cracked seams need only joint compound, new tape, or a combination of both. You usually do not need to replace the entire drywall panel when the panels remain secure and the surrounding material is in good condition.
|
Type of Seam Damage |
Recommended Repair |
When to Consider More Extensive Work |
|
Fine crack with firmly attached tape |
Apply compatible joint compound and refinish |
If the crack returns repeatedly |
|
Loose or peeling joint tape |
Remove failed tape, retape, and apply compound |
If the drywall beneath the tape is damaged |
|
Wide crack with panel movement |
Check fasteners and secure the panels before refinishing |
If framing movement or structural damage is suspected |
|
Seam with moisture damage |
Correct the moisture source and replace damaged material as needed |
If drywall is soft, swollen, mold-affected, or deteriorated |
|
Repeated ceiling seam cracks |
Inspect panel support, fasteners, and possible movement |
If the ceiling sags or the crack continues to widen |
The key is to repair the cause as well as the visible damage. Repeatedly filling the same crack without checking panel movement or moisture can waste time and materials.
Drywall Seam Repair: What Industry Guidance Says
Drywall seam repair follows published building practices, not guesswork. Gypsum industry standards, manufacturer instructions, and EPA guidance explain why seams crack and what a lasting repair requires. The table below connects that guidance to the causes and fixes covered in this article, so you can see what applies to your home.
| Repair Factor | Industry Guidance | Why It Matters for Seam Repair |
|---|---|---|
| Tapered vs. butt joints | Factory edges of drywall sheets are recessed (tapered) so tape and compound sit flush. Cut ends (butt joints) have no taper and are generally feathered wider. | Butt joints build up a visible hump when finished like tapered seams, so they often crack or show first |
| Tape choice | Paper tape is widely used for strong flat joints. Self-adhesive mesh tape is faster but is typically paired with setting-type compound for the first coat. | A mismatched tape and compound pairing is a common reason a repaired seam reopens |
| Coat width | Each coat should extend wider than the one before, so the edges feather into the wall. | Narrow, thick coats leave ridges and are more likely to crack as they dry |
| Ceiling panel support | ½” panels on ceilings with framing at 24″ on center can sag. Sag-resistant ½” or ⅝” panels are commonly used instead. | A sagging or flexing ceiling keeps stressing the seam, so patching the crack won’t last |
| Fastener setting | Screws should sit slightly below the surface (dimpled) without tearing the paper face. | Overdriven or popped fasteners weaken the panel’s grip and let the seam move |
| Control joints | ASTM C840 calls for control joints in long, continuous runs of walls and ceilings, such as ceilings longer than about 30 ft in either direction. | Long, uninterrupted surfaces need a place to move, or the stress shows up as cracks along seams |
| Framing movement | Lumber shrinks as it dries, especially in the first years after construction. | Explains seam cracks and nail pops in newer homes, and why a single repair may need a follow-up |
| Indoor humidity | The EPA recommends keeping indoor humidity below 60%, ideally 30-50%. | Humidity swings make drywall and framing expand and contract, a common cause of seam cracks in Georgia homes |
| Moisture damage | The EPA advises drying wet materials within 24-48 hours to help prevent mold growth. | Seams near leaks need the source fixed and the area fully dry before repair |
| Pre-1978 homes | Disturbing more than 6 sq ft of painted surface in pre-1978 housing may require lead-safe work practices under the EPA RRP Rule. | Relevant to older Metro Atlanta homes |
Source note: Gypsum Association (GA-214, GA-216), ASTM C840 and C475, U.S. EPA (mold and moisture guidance, RRP Rule), and manufacturer data sheets. Always follow the product label and local building codes.
Common Mistakes to Avoid When Repairing Drywall Seams
A few avoidable mistakes can cause cracks to return or make the repair noticeable.
-
Applying compound over loose tape: Remove failed tape and retape the seam where necessary.
-
Ignoring panel movement: Secure loose panels before refinishing the joint.
-
Using too much compound: Thin, even coats usually produce a smoother finish.
-
Skipping drying time: Follow the product instructions between coats.
-
Sanding too aggressively: Excessive sanding can damage the paper or expose the tape.
-
Painting without primer: Unprimed compound may absorb paint differently and leave a visible patch.
-
Ignoring moisture: Repairing a damp seam without fixing the source can lead to further damage.
When Should You Hire a Professional for Drywall Seam Repair?
DIY repairs can work well for small, stable cracks. However, professional help may be the better choice when:
-
Cracks keep returning after previous repairs.
-
Several seams have separated across a wall or ceiling.
-
The drywall tape has lifted over a long section.
-
The ceiling sags or the drywall feels loose.
-
Water damage has weakened the drywall.
-
The repair requires extensive texture matching or repainting.
-
You suspect significant framing movement or another underlying building issue.
If a crack grows quickly, appears alongside sagging, or accompanies other signs of structural movement, arrange an appropriate inspection instead of simply covering it with joint compound.
Not sure whether to handle the repair yourself? Compare the advantages of DIY vs. professional drywall repair in Alpharetta.
Why Choose JustFixToday for Drywall Repair in Alpharetta?
Cracked drywall seams can be frustrating, especially when they return after repeated patching. JustFixToday helps homeowners in Alpharetta address drywall damage and other household repair needs.
Professional help can make the process easier when a seam requires retaping, several finishing coats, texture matching, or repairs across a larger area. A proper assessment also helps determine whether the damage needs more than a cosmetic fix.
If you need drywall repair in Alpharetta, JustFixToday can help you work toward a smooth, consistent finish for your walls and ceilings.
Final Thoughts
Cracked or separating drywall seams can result from loose tape, poor installation, moisture, or movement in the building. A lasting repair starts with identifying the cause, removing failed materials, applying the right tape and joint compound, and finishing the surface carefully.
Small cracks may need only a straightforward patch, while wider or recurring cracks may require a closer inspection. Knowing how to repair drywall seams that are cracking or separating can help you decide when a DIY repair makes sense and when professional assistance is worthwhile.
Frequently Asked Questions
1. Why do drywall seams keep cracking after repair?
The original tape may have failed, the panels may move, or moisture may affect the joint. Identify and correct the underlying cause before repairing the seam again.
2. Can I use Spackle to fix a cracked drywall seam?
Spackle may work for a very small surface imperfection, but a seam with failed tape usually needs joint compound and proper re-taping. Choose the repair material based on the extent of the damage.
3. Should I replace drywall tape that is separating?
Yes, if the tape has lifted, bubbled, or lost its bond. Remove the failed section, prepare the surface, and install new tape with the appropriate joint compound.
4. Are cracks in drywall seams a sign of foundation problems?
Not necessarily. Many cracks result from normal settling, humidity changes, or installation issues. However, rapidly widening cracks, sticking doors, uneven floors, or other signs of movement warrant further inspection.
5. How long does drywall seam repair take?
A small repair may take only a short period of hands-on work, but drying between coats can extend the job over one or more days. Larger repairs, texture matching, and painting may require additional time.
Need Professional Drywall Seam Repair in Alpharetta?
If cracked or separating drywall seams are affecting the appearance of your walls or ceilings, JustFixToday can help assess the damage and restore the surface.
Call JustFixToday at (678) 549-8083 to discuss your drywall repair needs in Alpharetta and schedule professional service.
Failing seams are a job we see every week — our drywall repair service in Alpharetta re-tapes, muds, and blends so the seam disappears for good.