
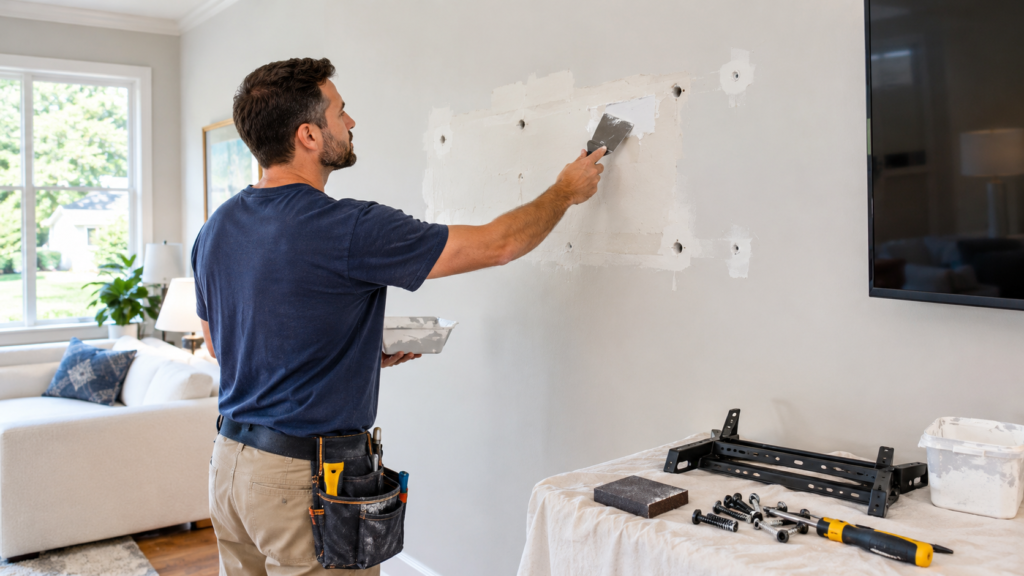
How to Repair Drywall After Removing Wall-Mounted Fixtures
Removing a television, shelf, mirror, cabinet, curtain hardware, or other wall-mounted fixture can leave behind more than a few screw holes. Anchors can pull out chunks of drywall, mounting brackets can leave dents, and adhesive or hardware removal can damage the wall surface.
If you are wondering How to Repair Drywall After Removing Wall-Mounted Fixtures, the right method depends on the size and depth of the damage. Small screw holes are usually straightforward to patch, while larger openings or torn drywall paper require more preparation and finishing.
What Happens to Drywall When Fixtures Are Removed?
Homeowners commonly secure wall-mounted fixtures with screws, anchors, brackets, or other hardware. Removing them can affect the drywall in several ways.
Common damage includes:
-
Small screw and nail holes
-
Holes left by drywall anchors
-
Torn drywall paper
-
Dents around mounting points
-
Larger openings caused by pulled-out anchors
-
Cracks around old mounting holes
-
Adhesive residue from mounted items
-
Damaged or uneven wall texture
How the installer fitted the fixture also affects the condition of the wall. A lightweight picture frame may leave only a small hole, while a wall-mounted television or heavy shelving system may require several anchors and larger mounting points.
Step-by-Step Drywall Repair After Removing Wall Fixtures
The repair process should match the size and condition of the damaged area. Rushing the preparation stage can leave visible bumps, depressions, or cracks after painting.
1. Remove Remaining Hardware
Start by removing any remaining screws, anchors, brackets, or other hardware.
Do not simply push a damaged anchor deeper into the wall if it has pulled away from the drywall. Remove it carefully so you can inspect the surrounding surface.
If adhesive remains on the wall, remove it carefully without unnecessarily tearing the drywall paper.
2. Inspect the Damage
Examine each hole before applying any repair compound.
A small screw hole may only require lightweight spackle or joint compound. A larger anchor hole may need a patching compound or mesh patch.
If the drywall paper around the hole is torn, cut away loose material and create a stable surface for the repair.
3. Prepare the Surface
Clean dust and loose debris from the damaged area. The surrounding drywall should be dry and reasonably clean before applying compound.
For torn drywall paper, avoid leaving loose edges underneath the new compound. Damaged paper can cause an uneven finish or make the repair more difficult to blend.
4. Fill Small Holes
You can generally fill small screw and nail holes with an appropriate patching compound or joint compound.
Press the compound into the hole and smooth it over the surrounding surface. Avoid leaving a large mound of compound because excessive material creates additional sanding work.
5. Repair Larger Anchor Holes
Larger holes may require a more substantial repair. Depending on the size, you may need mesh tape, a drywall patch, or a replacement piece of drywall.
The patch should sit securely and the compound should be feathered beyond the repair area. This creates a gradual transition between the damaged section and the original wall.
6. Allow the Compound to Dry
Drying time depends on the product, application thickness, temperature, and humidity.
Avoid sanding or applying another coat before the compound has adequately dried. Working too quickly can pull material away from the repair and create an uneven surface.
7. Sand and Smooth the Repair
Once dry, lightly sand the area until it feels level with the surrounding wall.
Use enough sanding to remove ridges and high spots without damaging the surrounding drywall paper. Check the repair from different angles and under good lighting.
8. Prime and Paint
A repaired section should be properly prepared before painting. Primer can help create a more uniform surface and reduce differences in paint absorption.
When possible, use matching paint with the same color and sheen as the existing wall. If the wall has aged significantly, painting a larger section may produce a more consistent finish.
How Much Damage Can Be Repaired?
The size and type of damage determine the appropriate repair approach. The table below provides a practical comparison.
|
Type of Wall Damage |
Typical Repair Method |
Level of Repair |
|
Small screw or nail hole |
Spackle or joint compound |
Minor |
|
Small drywall anchor hole |
Patching compound |
Minor |
|
Torn drywall paper |
Remove loose paper, seal and refinish |
Moderate |
|
Medium anchor opening |
Mesh or drywall patch |
Moderate |
|
Large mounting hole |
Drywall patch or replacement section |
More extensive |
|
Multiple damaged mounting points |
Individual patches or larger repair area |
Moderate to extensive |
Drywall Repair Standards and Safety Guidelines
Good drywall repair follows established industry standards, and older homes can involve safety considerations. This reference summarizes guidance from recognized authorities.
| Repair Factor | Industry Guidance | Why It Matters After Removing Fixtures |
|---|---|---|
| Finish quality | Drywall finishing is classified into Levels 0-5. Level 4 is typical for flat-painted walls, and Level 5 (skim coat) is recommended for gloss paint or critical lighting. | Explains why a patch can look fine until paint or raking light shows it |
| Application and finishing | Joint compound, tape, and patch application should follow published gypsum panel practices. | Supports proper feathering and multi-coat technique |
| Wall thickness | Residential walls are commonly ½” drywall, with ⅝” used where fire-rated assemblies are required. | A replacement patch must match thickness to sit flush |
| Stud spacing | Studs are typically 16″ or 24″ on center. | Large patches should be anchored to studs or backing, not just the drywall edge |
| Drying and recoat times | Setting-type compounds cure by chemical reaction (about 20-90 minutes by type). Ready-mix compounds air-dry and often need hours or overnight, depending on thickness and humidity. | Backs up the “don’t rush” advice with product-specific timing |
| Pre-1978 homes | Disturbing more than 6 sq ft of painted surface in pre-1978 housing may require lead-safe work practices. | Relevant to older Metro Atlanta homes |
| Older joint compound | Patching and joint compounds in older homes may contain asbestos. Suspect materials should be tested before sanding. | Warns readers before they sand old repairs |
Source: Standards referenced from the Gypsum Association (GA-214 Recommended Levels of Finish and GA-216), ASTM C1396, the International Residential Code (International Code Council), the U.S. EPA Renovation, Repair and Painting (RRP) Rule, U.S. EPA and CPSC asbestos guidance, and product manufacturer data sheets. Always follow the specific product label and local building codes.
Common Mistakes to Avoid
One of the most common mistakes is filling a large anchor hole without properly preparing the damaged edges. The patch may look acceptable initially but can become visible after the wall is painted.
Another mistake is sanding too aggressively. Excessive sanding can damage the drywall paper around the repair and create another problem to fix.
Painting immediately after applying compound can also produce an uneven finish. The repair should dry and be properly prepared before primer and paint are applied.
Homeowners should also avoid leaving old anchors inside the wall when they can be safely removed. Loose hardware can interfere with a clean repair.
When Should You Hire a Professional?
Small screw holes are often manageable as a DIY project. Professional drywall repair may be a better option when the damage is larger, numerous, or difficult to blend.
Consider professional help when:
-
A television mount has left multiple large holes.
-
Heavy shelving pulled out drywall anchors.
-
The drywall paper is badly torn.
-
Several areas need repair.
-
The wall has a difficult texture to match.
-
The damaged area is large.
-
Previous patches are cracking or visible.
-
You want the wall ready for painting without noticeable repairs.
Professional assistance can also save time when fixture removal is part of a larger home improvement project.
Why Choose JustFixToday for Drywall Repair?
JustFixToday provides professional handyman services for homeowners in Alpharetta and surrounding Metro Atlanta communities.
Removing wall-mounted fixtures can leave several different types of damage, and each one may require a different repair approach. Proper preparation, patching, sanding, and finishing help restore the wall rather than simply covering the visible holes.
JustFixToday offers licensed and insured professionals who are background-checked and can assist with drywall repairs as part of individual maintenance projects or larger home improvement work.
Final Thoughts
Knowing How to Repair Drywall After Removing Wall-Mounted Fixtures can help homeowners decide whether a few simple holes require DIY attention or whether the wall needs professional repair.
Small screw holes may need only a small amount of compound, while damaged drywall paper, large anchor holes, and multiple mounting points require more careful preparation. Taking the time to repair, sand, prime, and paint the surface properly can make the finished wall look much cleaner.
If you are unsure How to Repair Drywall After Removing Wall-Mounted Fixtures, assessing the size and condition of the damage before starting can help you choose the right repair method.
Frequently Asked Questions
Can I repair drywall after removing a TV mount?
Yes. Small mounting holes can often be filled with patching compound, while larger holes or torn drywall may require a patch and additional finishing.
How do I repair drywall anchor holes?
Remove the anchor, clean the damaged area, and fill the opening with suitable patching compound. Larger holes may require mesh or a drywall patch.
Can torn drywall paper be repaired?
Yes. Remove or stabilize loose paper before applying the appropriate repair material. Then sand, prime, and paint the surface.
How do I make drywall repairs invisible after removing shelves?
Properly feather the compound, sand the surface smoothly, use primer, and match the surrounding paint. Wall texture may also need to be reproduced.
Should I hire a handyman for multiple drywall holes?
If a wall has several holes, torn paper, large openings, or difficult textures to match, a professional can repair the damage and deliver a more consistent finish.
Need Drywall Repair After Removing a Wall Fixture?
If removing a TV, shelf, mirror, cabinet, or other fixture has left holes or damaged drywall, JustFixToday can help restore the wall.
Call JustFixToday at (678) 549-8083 to discuss your drywall repair needs in Alpharetta and schedule professional service.
Left with anchor holes and torn paper? Our drywall repair service in Alpharetta makes walls look untouched — free estimates, written prices.